Home - Recipes - Butcher
Charts -The Wood - Que Tips - BBQ Lingo
Smokers - Que Gear - Pitmasters - BBQ Nation - Leftovers - About Us
![]()
As with any hobby or passion, there are certain tools, equipment, gear, or Toy's, required in order to achieve the desired results. A custom fitted
bowling ball, that prize shotgun, or the fastest bass boat on the lake. Below are a few of the toys, I mean tools, that will make your BBQ experience not
only easier and more
fun, but also help you produce the quality of food you
will be proud to serve your family and friends.
Meat Thermometers
A good meat thermometer is a must have for any outdoor cooking. As you can imagine, there are many different brands, types, styles and price ranges. Regardless of which type you choose, keep in mind, a thermometer is of little value regardless of price or style if it doesn't give you an accurate reading.
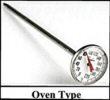 The least expensive,
and least useful thermometers are the oven type meat
thermometer that is placed in the meat and left there
while cooking. There are two major problems with this
type of thermometers. First, as a rule they are not very
accurate since they use the old fashion dial type
readout which relies on a metal spring or link
contracting and expanding. The second thing is you have
to open your smoker to read the temperature, which of
course should be avoided if possible.
The least expensive,
and least useful thermometers are the oven type meat
thermometer that is placed in the meat and left there
while cooking. There are two major problems with this
type of thermometers. First, as a rule they are not very
accurate since they use the old fashion dial type
readout which relies on a metal spring or link
contracting and expanding. The second thing is you have
to open your smoker to read the temperature, which of
course should be avoided if possible.
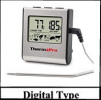 The next type is a
digital thermometer with a probe attached to a long
cable or wire. With this type, the wire is ran inside
the smoker via a vent hole or other opening and the
probe inserted into the meat. The probe is left in the
meat during cooking as with the oven type thermometer
but the wire leading to the outside is connected to a
digital readout unit. These type thermometers are in
general much more accurate than the mechanical type and
since the display unit is on the outside, you
don't have to keep opening your pit.
The next type is a
digital thermometer with a probe attached to a long
cable or wire. With this type, the wire is ran inside
the smoker via a vent hole or other opening and the
probe inserted into the meat. The probe is left in the
meat during cooking as with the oven type thermometer
but the wire leading to the outside is connected to a
digital readout unit. These type thermometers are in
general much more accurate than the mechanical type and
since the display unit is on the outside, you
don't have to keep opening your pit.
 Next is the same as the digit
thermometer with one major difference. It has a Wi-Fi
(or Bluetooth) transmitter and receiver. Personally I
love this type of setup. You can have a seat in the
shade of your patio or relax inside and check
your meat temperature with the remote Wi-Fi receiver
or your phone with a Bluetooth model.
Next is the same as the digit
thermometer with one major difference. It has a Wi-Fi
(or Bluetooth) transmitter and receiver. Personally I
love this type of setup. You can have a seat in the
shade of your patio or relax inside and check
your meat temperature with the remote Wi-Fi receiver
or your phone with a Bluetooth model.
Keep in mind, with all these different types, the
probe is still only reading in one area of the meat,
unless of course you open your pit and move it.
 The next type is the instant read
thermometer. In my opinion, this is an absolute must
for grilling and smoking. A good instant read will
give you an accurate reading in about 2 seconds. Even
though you do have to open your pit, you are able to
quickly take a reading in different areas of the meat,
which can be very important with many meats such as
poultry, and then close your pit in short time. You
can find various brands of these on Amazon for around
$20.00 or less.
The next type is the instant read
thermometer. In my opinion, this is an absolute must
for grilling and smoking. A good instant read will
give you an accurate reading in about 2 seconds. Even
though you do have to open your pit, you are able to
quickly take a reading in different areas of the meat,
which can be very important with many meats such as
poultry, and then close your pit in short time. You
can find various brands of these on Amazon for around
$20.00 or less.
Injectors
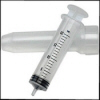 The plastic, economy syringe is
exactly the same thing you might find at a hospital
emergency room. They work well for an all liquid injection
and like their medical counterparts are made for a "One Time
Use". Although you can clean it and get a few uses out it,
don't push your luck. In addition, the needle orifice is
small and easily clogs with injections containing spices.
Even a course ground black pepper can jamb the needle.
The plastic, economy syringe is
exactly the same thing you might find at a hospital
emergency room. They work well for an all liquid injection
and like their medical counterparts are made for a "One Time
Use". Although you can clean it and get a few uses out it,
don't push your luck. In addition, the needle orifice is
small and easily clogs with injections containing spices.
Even a course ground black pepper can jamb the needle.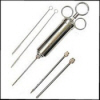 The stainless steel model would
be the best for most backyard pitmaster as well as
competition cooks. They have a larger tube capacity so you
can inject more meat without reloading. You get a variety
of needles for better performance on different cuts of
meats, and the needle orifice is sufficiently large for
most injections with multiple spices. You can find various
brands of these on Amazon for around $15.00 or less.
The stainless steel model would
be the best for most backyard pitmaster as well as
competition cooks. They have a larger tube capacity so you
can inject more meat without reloading. You get a variety
of needles for better performance on different cuts of
meats, and the needle orifice is sufficiently large for
most injections with multiple spices. You can find various
brands of these on Amazon for around $15.00 or less.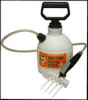 The tank sprayer injector might
be the ticket if your doing a dozen briskets or a whole
hog. These are typically comprised of a 1 gallon
plastic tank, a hose and a multi-needle attachment
allowing you to inject larger cuts of meat faster. Chances
are, if you need one of these, you know more about
injectors than I do.
The tank sprayer injector might
be the ticket if your doing a dozen briskets or a whole
hog. These are typically comprised of a 1 gallon
plastic tank, a hose and a multi-needle attachment
allowing you to inject larger cuts of meat faster. Chances
are, if you need one of these, you know more about
injectors than I do.
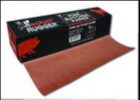
Wraps
There are many good products to make your smoker more efficient, and to help eliminate baked on messes, saving you tons of time and aggravation. Below are a few of my favorite items to help make your cooks more enjoyable and your food tastier.
Non-Stick Aluminum Foil
 It
would be difficult to say too much about this product. It is a
life saver around the oven, grill and smoker. The non-stick
surface keeps even the toughest foods, like cheese or wings,
from sticking. It is made using a food safe silicon, the same
type material used to make Silpat cooking pads. During
manufacturing one side of the foil is coated with a fine layer
of silicon. The bulk roll is then heat treated to "set" the
non-stick coating to the foil. The best thing I love about
non-stick foil is not using it to keep food from sticking, but
rather cutting down on your smoker cleanup by keeping your
smoking pans, trays, water pan and drip pan clean. By placing
the non-stick side down, next to the metal, and using it to line
all of your smokers internal items, it eliminates removal of
almost all of the dried and baked on drippings and sauces
created from hours of smoking. Regular foil will help with
cleanup but the foil itself often sticks to the metal parts and
makes cleanup even more difficult.
It
would be difficult to say too much about this product. It is a
life saver around the oven, grill and smoker. The non-stick
surface keeps even the toughest foods, like cheese or wings,
from sticking. It is made using a food safe silicon, the same
type material used to make Silpat cooking pads. During
manufacturing one side of the foil is coated with a fine layer
of silicon. The bulk roll is then heat treated to "set" the
non-stick coating to the foil. The best thing I love about
non-stick foil is not using it to keep food from sticking, but
rather cutting down on your smoker cleanup by keeping your
smoking pans, trays, water pan and drip pan clean. By placing
the non-stick side down, next to the metal, and using it to line
all of your smokers internal items, it eliminates removal of
almost all of the dried and baked on drippings and sauces
created from hours of smoking. Regular foil will help with
cleanup but the foil itself often sticks to the metal parts and
makes cleanup even more difficult.
One word of caution. Do Not cover your smoker racks with any kind of foil. Especially, electric, propane and pellet smokers. The design of most of these type smokers is such that the smoke is created in the lower part of the unit and flows upward to an exit vent, cooking and flavoring your food along the way. If you cover too much of a rack, it cuts off the heat and smoke from rising above it, interrupting the cooking process and preventing a good exchange of fresh air which is essential for a good clean burning smoke. It can even cause some serious damage to your smoker as well. Give this product a try, and you'll be a believer too. It is also available by store or generic name in many of the major food stores. The store brands work just as well as the name brand and in most cases made by the name brand company.
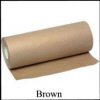
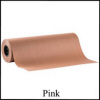
Butcher Paper
 Another handy
wrap to have around is butcher paper. Most people don't think
too much about this little wonder, but there are some good
reasons why it's been around for over 100 years. You'll find
it being used in butcher shops, deli's, restaurants and many
other food establishments. For example, butcher paper tray liners, basket liners,
and table coverings have offered many delis and restaurants clean,
crisp, and functional utility at a much lower cost than
traditional plates and tablecloths. Before the advent of
paper plates, it was used in the early BBQ joints to serve
the meat on, and is still used by some of the classic BBQ
restaurants today. We're all accustomed to seeing our meat
sold to us wrapped in butcher paper at your local butcher or
meat counter, but in more recent years it has made a big
splash in the BBQ world, aside from serving as a plate.
Another handy
wrap to have around is butcher paper. Most people don't think
too much about this little wonder, but there are some good
reasons why it's been around for over 100 years. You'll find
it being used in butcher shops, deli's, restaurants and many
other food establishments. For example, butcher paper tray liners, basket liners,
and table coverings have offered many delis and restaurants clean,
crisp, and functional utility at a much lower cost than
traditional plates and tablecloths. Before the advent of
paper plates, it was used in the early BBQ joints to serve
the meat on, and is still used by some of the classic BBQ
restaurants today. We're all accustomed to seeing our meat
sold to us wrapped in butcher paper at your local butcher or
meat counter, but in more recent years it has made a big
splash in the BBQ world, aside from serving as a plate.
Both butcher and steak (peach) papers have something
called “sizing” added, which is basically a treatment that
dictates the wet strength of the paper, which is what keeps it
from falling apart when it gets wet.
Butcher paper is designed for same day use because you buy
your piece of meat and carry it home, then discard the paper,
so it’s more porous. The natural base of most butcher
paper in the U.S. is made using only Southern Pine. Steak
paper is made for retail display, and therefore is designed to
be more robust, and not let as much air reach the product
(because air discolors the meat). Steak or Peach paper is far
denser than butcher, and is manufactured using more
hardwood fibers which results in a more rigid product. Dense
enough to hold in moisture, but also porous enough to allow
the meat to breath.
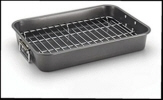
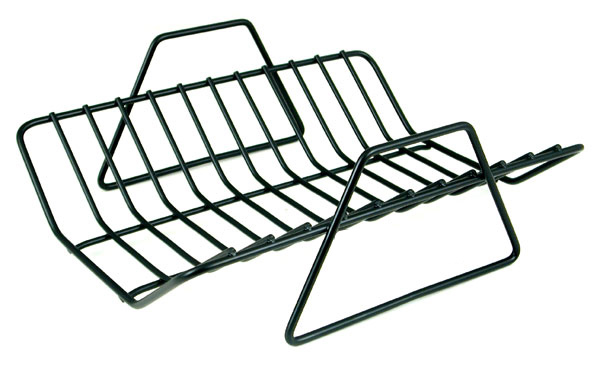
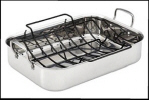
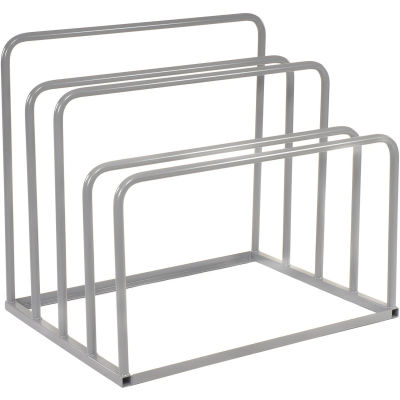
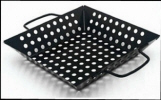
Trays and Pans with Racks

Basters - Brushes -Bottles
 First
is the the regular, everyday, plain old spray bottle. Widely
available at department stores, hardware, groceries stores and
just about any other store you can name. These are one of
cheapest tools you can buy and can serve several task such as
spraying water to knock down grill flare ups or spritzing
apple juice on your prize pork butt. They are not without
limitation though. They clog easily so are not suitable for
thicker sauces, or liquids with course spices.
First
is the the regular, everyday, plain old spray bottle. Widely
available at department stores, hardware, groceries stores and
just about any other store you can name. These are one of
cheapest tools you can buy and can serve several task such as
spraying water to knock down grill flare ups or spritzing
apple juice on your prize pork butt. They are not without
limitation though. They clog easily so are not suitable for
thicker sauces, or liquids with course spices.  In
addition, spray bottles are also available in a set with the
outdoor cook in mind. They are a little smaller than the
household model and are color coded. These are very handy if
you are smoking several different meats at one time. You can
have apple juice in one for your pork, vinegar in another and
Worcestershire sauce for your brisket in another. But like
their big brother, they clog easily and only work well with
thin liquids.
In
addition, spray bottles are also available in a set with the
outdoor cook in mind. They are a little smaller than the
household model and are color coded. These are very handy if
you are smoking several different meats at one time. You can
have apple juice in one for your pork, vinegar in another and
Worcestershire sauce for your brisket in another. But like
their big brother, they clog easily and only work well with
thin liquids.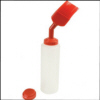 Next
is a rather strange looking device consisting of a plastic
bottle with a brush attached. I was a bit skeptical about
these until I tried one, and now it's one of my favorite
tools. They will clog with very course spices but handle thin
liquids and even thicker sauces well. The brush actually works
very well and they are by far the least messy of the brush
type applicators.
Next
is a rather strange looking device consisting of a plastic
bottle with a brush attached. I was a bit skeptical about
these until I tried one, and now it's one of my favorite
tools. They will clog with very course spices but handle thin
liquids and even thicker sauces well. The brush actually works
very well and they are by far the least messy of the brush
type applicators.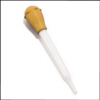 Next
is the common everyday turkey baster. Something almost
everyone already has on hand, this does get the job done, but
for using with the smoker probably my least favorite of all.
If your using the juice from the bottom of a pan your cooking
your meat in, as with your thanksgiving turkey, it serves the
purpose pretty well, but if you are transferring your liquid
from another container to your meat, they can be very messy.
Next
is the common everyday turkey baster. Something almost
everyone already has on hand, this does get the job done, but
for using with the smoker probably my least favorite of all.
If your using the juice from the bottom of a pan your cooking
your meat in, as with your thanksgiving turkey, it serves the
purpose pretty well, but if you are transferring your liquid
from another container to your meat, they can be very messy.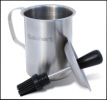 Next
is an ingenious set up that works very well around the smoker
or grill. A brush is attached to the lid of a canister. You
can put your favorite sauce in the canister and the lid serves
to brush your meat and at the same time, keep flies out of
your sauce. The only drawback I have is the canister is rather
small. Mine holds 16 oz., plenty of sauce for two racks of
ribs or a few chicken quarters, but if your doing a smoker
full of meat as I often do, you will need to plan on doing a
few refills. All in all, it is still a very convenient and
practical setup.
Next
is an ingenious set up that works very well around the smoker
or grill. A brush is attached to the lid of a canister. You
can put your favorite sauce in the canister and the lid serves
to brush your meat and at the same time, keep flies out of
your sauce. The only drawback I have is the canister is rather
small. Mine holds 16 oz., plenty of sauce for two racks of
ribs or a few chicken quarters, but if your doing a smoker
full of meat as I often do, you will need to plan on doing a
few refills. All in all, it is still a very convenient and
practical setup.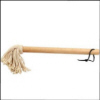 The next applicator has probably been used more than any other
applicator shown here. The mop shown here is a scaled down
version of the larger mops pitmasters have used for
generations. The older large establishments, would use regular
house mops trimmed up for easier use. Competition teams use
these smaller mops a lot because they sauce the meat very well
and most important, they don't leave brush marks on the meat
which most judges will fined unattractive. They are a great
tool to apply sauces, but are without a doubt the messiest
applicator of all.
The next applicator has probably been used more than any other
applicator shown here. The mop shown here is a scaled down
version of the larger mops pitmasters have used for
generations. The older large establishments, would use regular
house mops trimmed up for easier use. Competition teams use
these smaller mops a lot because they sauce the meat very well
and most important, they don't leave brush marks on the meat
which most judges will fined unattractive. They are a great
tool to apply sauces, but are without a doubt the messiest
applicator of all.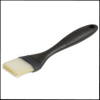
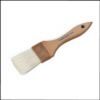 The next two are your basic basting
brushes. These are probably the most used of all by backyard
chefs. You can purchase ones that are specifically made for
outdoor cooking which consist of a brush on one end and a
handle made of rustproof, dishwasher safe plastic. They are
fairly inexpensive and will last almost for ever. Last, but
certainly not least, is the regular disposable type paint
brush sold at any hardware store. These come in a variety of
sizes and usually only cost about a buck. Though they are
considered disposable brushes in the painting industry, you
can get many BBQ cooks out of one. I have some I've been using
for a few years an aside from a little surface rust on the
metal band, they are still in good working order. Personally I
prefer the 2" width.
The next two are your basic basting
brushes. These are probably the most used of all by backyard
chefs. You can purchase ones that are specifically made for
outdoor cooking which consist of a brush on one end and a
handle made of rustproof, dishwasher safe plastic. They are
fairly inexpensive and will last almost for ever. Last, but
certainly not least, is the regular disposable type paint
brush sold at any hardware store. These come in a variety of
sizes and usually only cost about a buck. Though they are
considered disposable brushes in the painting industry, you
can get many BBQ cooks out of one. I have some I've been using
for a few years an aside from a little surface rust on the
metal band, they are still in good working order. Personally I
prefer the 2" width.Grinders and Processors
A grinder is a great addition if you plan to mix your own rub ingredients. They come in many different sizes, electric or manual grind as well as many other features. One of the main things to consider is how much spice mix you plan to make at one time. Spice grinders are typically smaller in size where as coffee grinders are generally more suited to the amount you might need for one cook, such as a couple of racks of ribs, a pork butt or brisket. If you plan to make enough to store or share with your friends you will want to look at food processors.
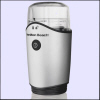 This is a typical, small,
one serving grinder made for coffee or spices. This
generally makes enough spice to do a single meat. I
prefer this size because I generally smoke more than one
protein at the time. This small grinder allows me to
make just enough rub for my pork butt and then make a
different mix for my brisket or chicken, etc.. I also
like to make my spice fresh for each cook. Although I
have my standard rub recipes, sometimes I might have
friends or family over who like a little more heat or
maybe a little more sweet. By making my rubs one at the
time, it allows me to more customize my cooks.
This is a typical, small,
one serving grinder made for coffee or spices. This
generally makes enough spice to do a single meat. I
prefer this size because I generally smoke more than one
protein at the time. This small grinder allows me to
make just enough rub for my pork butt and then make a
different mix for my brisket or chicken, etc.. I also
like to make my spice fresh for each cook. Although I
have my standard rub recipes, sometimes I might have
friends or family over who like a little more heat or
maybe a little more sweet. By making my rubs one at the
time, it allows me to more customize my cooks. If you prefer to make enough
rub to store for future cooks or share with your friends,
a food processor might be a better choice. A regular
size processor will make enough rub for several smoking
adventures. In addition, if you are planning to take part
in competition cooks, you will need to make a considerable
amount of spice for each event. This type of unit will
help save you a great deal of time.
If you prefer to make enough
rub to store for future cooks or share with your friends,
a food processor might be a better choice. A regular
size processor will make enough rub for several smoking
adventures. In addition, if you are planning to take part
in competition cooks, you will need to make a considerable
amount of spice for each event. This type of unit will
help save you a great deal of time.
There you go. Add a few or all
of these to your BBQ arsenal and make your cooks easier,
tastier and more fun.
Want more information or
recommendations about a certain product?
"Drop Us A Line"